autopsy is a digital forensic investigation tool used by military personnels and corporate examiners to investigate which operations were currently performed on a target system, flash drive or specific files. so let's dig into it.
Get Autopsy
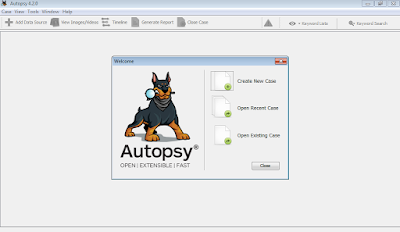
first of all we need to get Autopsy from this URL and then install it, upon successful installation you should be greeted with following screen.
 |
| autopsy first run |
next we have to create a new case for investigation. so we'll just go ahead and click on create new case, specify the case name, investigator name & location of the case file to be saved.
 |
| case name, examiner |
okay upon doing this it'll greet you with another toolbar activated. from where you can add data source for the specific case under investigation. so add any source that either could be an image or VM file, a Local File System of Single Files. so let's go ahead and now give it a single file that is basically darkcomet server so we can see how it goes ahead and investigates its hash and other critical information. let's do it.
 |
| darkcomet selected. |
we have to select which ingest modules we wanted to load and which we want to skip so in this particular case i am going to select all the modules.
 |
| autopsy modules selected |
clicking any of the modules will result in opening its particular settings for digital forensic investigation in right side pane. so you can do it also if u need to change something, i'll go with default values for the time being. click next & finish and now you're up. you should be watching this screen now.
 |
| darkcomet in exe list of autopsy |
now let's do some interesting things to find out what file can give us. click on directory listing tab and select our executable file now click on data content tab and you'll see a whole list of hex, strings and metadata let's quickly investigate it.
 |
| malware investigation |
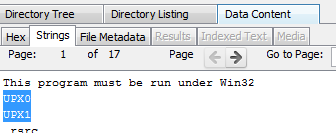
if we click on strings tab we can clearly see there a string as UPX0 & UPX1 and i hope we all know what UPX is, for those who don't.
UPX is a file packer for binary executeable files. more at WikiPedia
which basically confirms that the file is packed so this could be malicious.
 |
| Upx packed darkcomet |
now thus we have some clues that the file could be malicious, we can put a malicious tag on file by right clicking, i added the tag malware.
 |
| malwared files tag |
 |
| malware tag file selected |
upon looking more closely on strings tab we found some Windows Api calls that could be triggered by the malwares so here is the screenshot.
 |
| malware api calls |
so using this way we can confirm it to be a somekinda malware and move it towards the malware research and analysis department, well this was a very basic scenario, we'll further post the detailed tutorial on filesystem analysis with autopsy and automated malware analysis with autopsy so stay tuned, leave your feedback and below is the video demo for dummies, please don't forget to share us with your community.
Many Efforts to explain the crucial information
ReplyDeletePrivate Autopsy Company
Forensic Autopsy